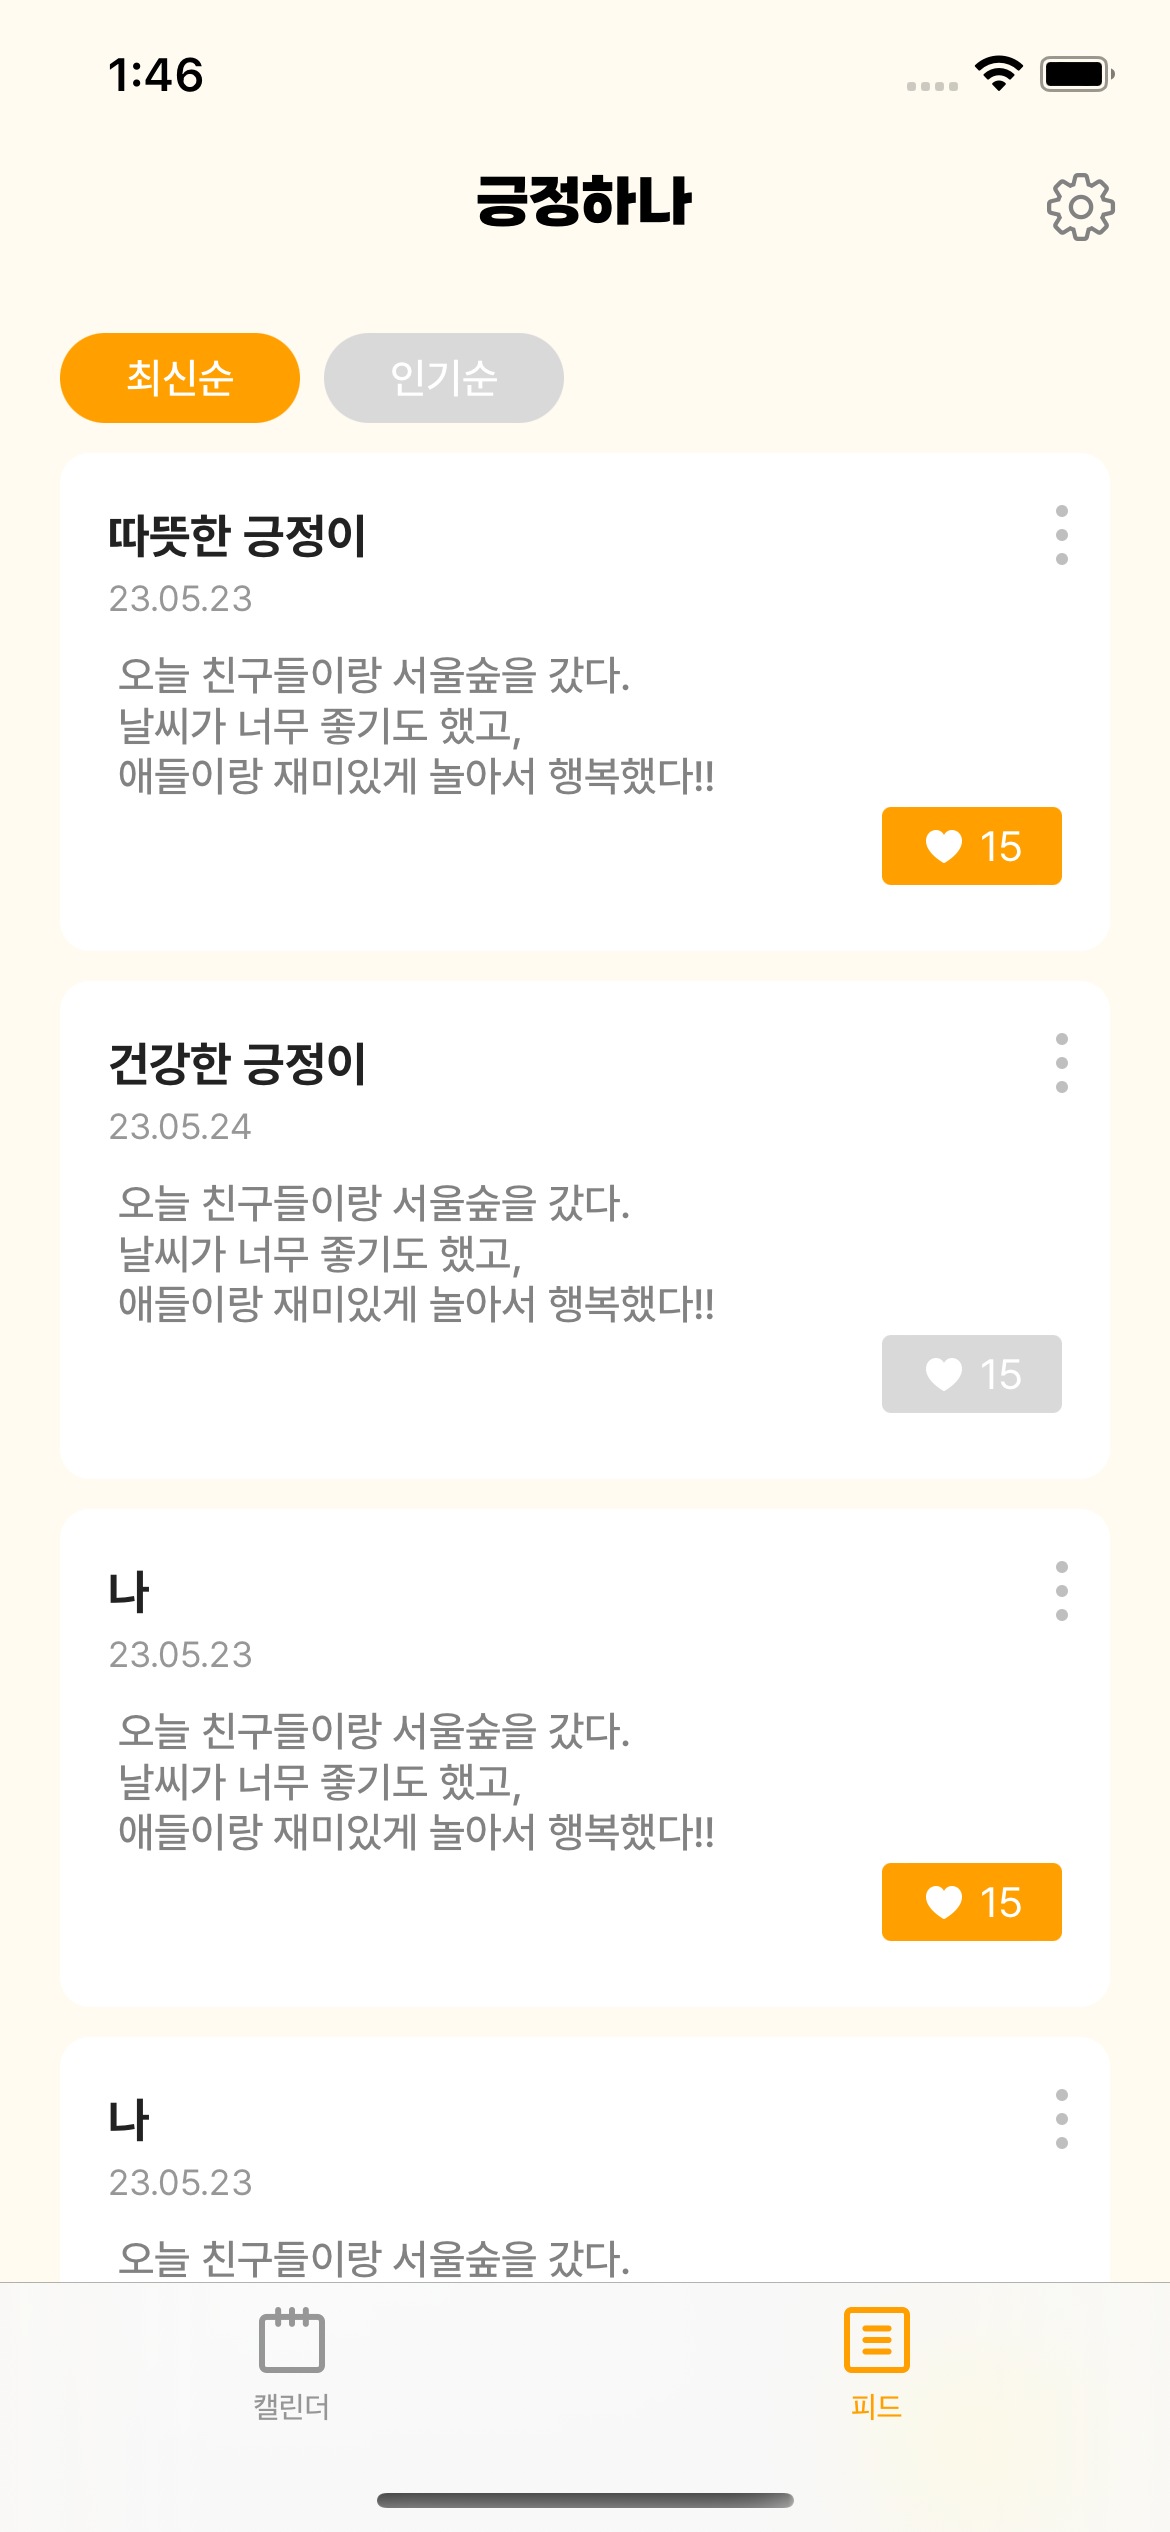
SwiftUI로 프로젝트 작업을 하면서 TabView를 통해 탭바를 구현했다.

TabView를 사용하면 코드가 매우 간단하지만.. 커스텀에서 유연하지 못했다.
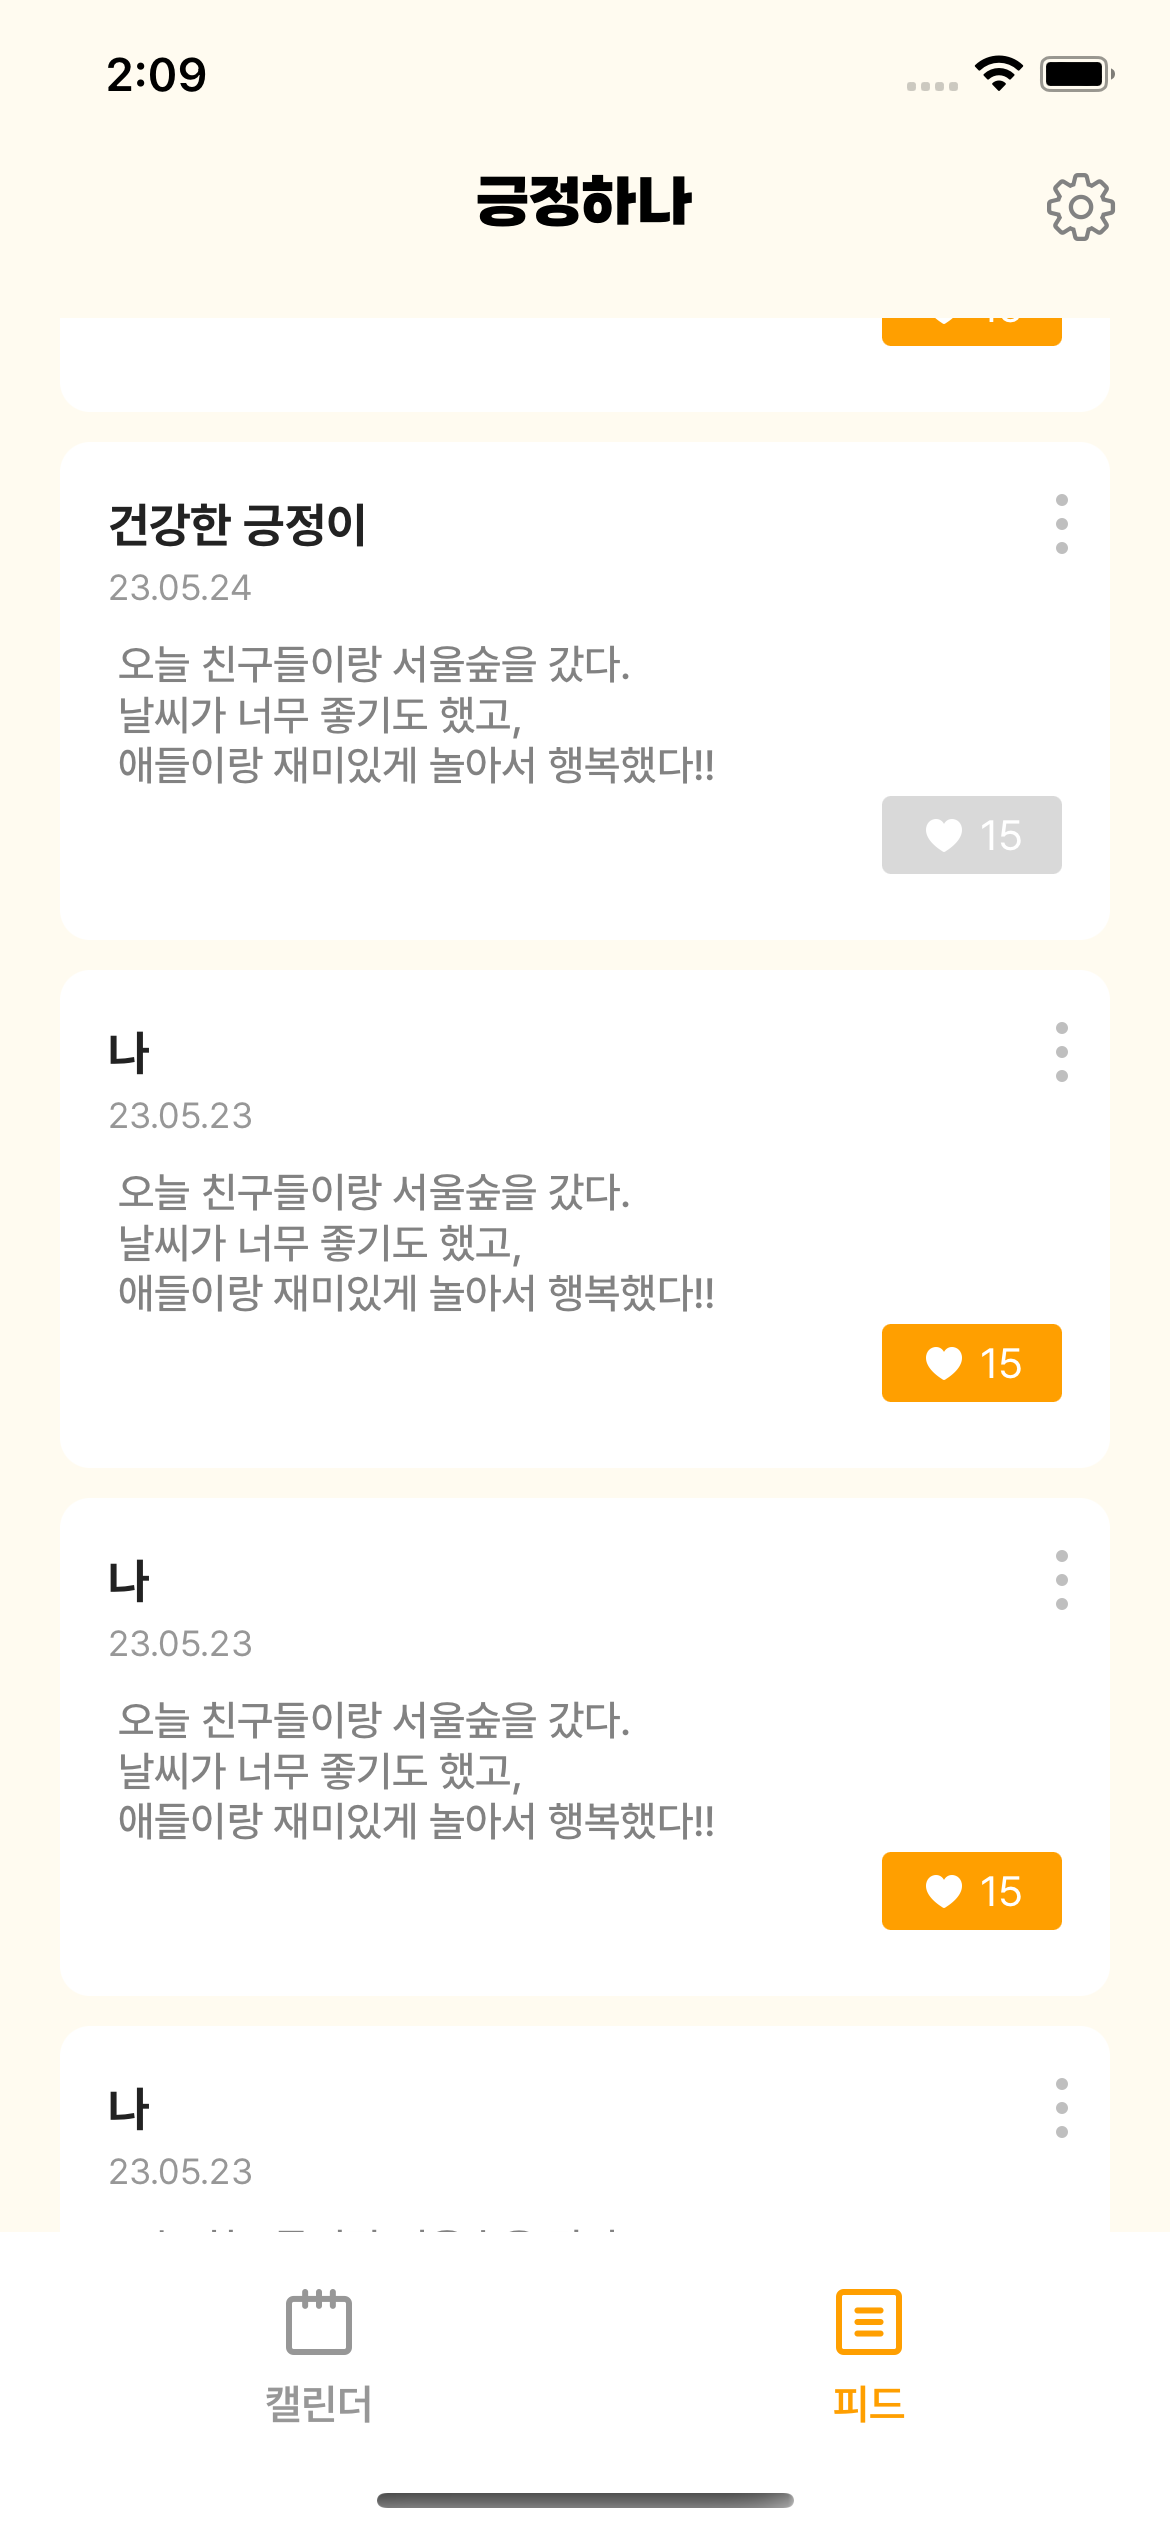
- 탭바 배경색 변경 (흰색으로), 스크롤 할 때 투명도 없애기
- 탭바 높이 변경
- 탭바 글씨체 변경
을 해야했기 때문에 CustomTabView를 만들었다.
CustomTabView.swift
import SwiftUI

enum Tab {
    case calendar
    case feed
}

struct CustomTabView: View {

    @Binding var selectedTab: Tab

    var body: some View {
        HStack(alignment: .center) {

            Button {
                selectedTab = .calendar
            } label: {
                VStack(spacing: 8) {
                    Image(selectedTab == .calendar ? "calendarSelected" : "calendarUnSelected")

                    Text("캘린더")
                        .foregroundColor(selectedTab == .calendar ? .Custom.PositiveYellow : .Custom.Black60)
                        .font(CustomFont.PretendardSemiBold(size: 14).font)
                }
                .offset(x: -5)
            }
            .padding(.horizontal, UIScreen.main.bounds.width/4 - 30)


            Button {
                selectedTab = .feed
            } label: {
                VStack(spacing: 8) {
                    Image(selectedTab == .feed ? "feedSelected" : "feedUnSelected")

                    Text("피드")
                        .foregroundColor(selectedTab == .feed ? .Custom.PositiveYellow : .Custom.Black60)
                        .font(CustomFont.PretendardSemiBold(size: 14).font)
                }
                .offset(x: 5)
            }
            .padding(.horizontal, UIScreen.main.bounds.width/4 - 30)
        }
        .frame(width: UIScreen.main.bounds.width, height: 85)
    }
}
TabbarView.swft
import SwiftUI

struct TabbarView: View {

    @State var selectedTab: Tab = .feed

    var body: some View {

        VStack(spacing: 0) {
            switch selectedTab {
            case .calendar:
                CalendarView()
                    .environmentObject(CalendarManager())
            case .feed:
                FeedView()
            }
            CustomTabView(selectedTab: $selectedTab)
                .padding(.bottom, 15)
        }
        .edgesIgnoringSafeArea(.bottom)

    }
}
결과물

원하던 디자인의 탭바를 구현 할 수 있다!!
참고
https://www.youtube.com/watch?v=R_KZwX-yP4o
https://velog.io/@0000_0010/SwiftUI-Custom-Tab-Bar
[SwiftUI] Custom Tab Bar
[SwiftUI] Custom Tab Bar
velog.io
'iOS' 카테고리의 다른 글
| [ARC] CFGetRetainCount 함수로 참조 횟수 세보기 (1) | 2024.02.08 |
|---|---|
| [iOS] 코드 베이스로 프로젝트 세팅하기 (0) | 2024.01.21 |
| [iOS] NotificationCenter 동작 방식과 활용 방안에 대해 설명하시오. (0) | 2023.03.31 |
| iOS 13 이후 SceneDelegate 등장 (0) | 2023.03.14 |
| [iOS] UIButton image 오른쪽으로 정렬하기, scale 변경하기 (0) | 2023.01.12 |
